About elzbthc

I am a Graphic Artist and The Tomato Lady in the Spokane Valley, WA. I love creating beautiful things, horses, quilting, traveling, sightseeing, cooking, entertaining, and reading among other things.

Alcohol Ink: Stunning Jewelry Dishes to Make and Gift

Alcohol Ink: Stunning Jewelry Dishes to Make

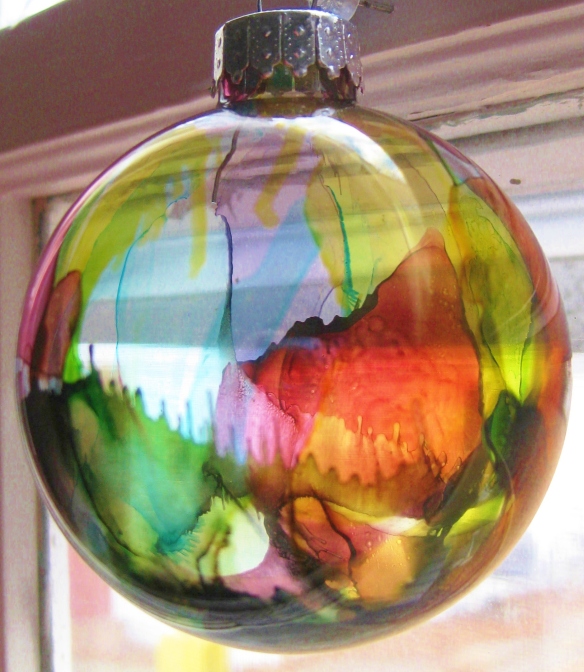
Alcohol ink jewelry dishes are easy to create, and make beautiful handmade gifts. Caution: you may become obsessed with this creative art.Alcohol Ink Jewelry DishesI

I’m a big proponent of making gifts for the holidays. I enjoy making them and I think most people enjoy receiving them. Little dishes are always useful in the home. I love using them for my earrings at the end of the day. Originally I thought about using sharpies with alcohol to make pretty dishes but then I ran across alcohol inks.

Back to today’s Alcohol Ink Jewelry Dish Tutorial:

Supplies
Ceramic dishes
Alcohol Inks
Canned Air
Isopropyl Rubbing Alcohol 91%
Cotton Swabs
Protective Spray Gloss

If you haven’t tried alcohol inks yet, you are in for a treat. I love the transparent look they have, somewhat like very intense watercolors. I played around the many techniques and patterns you can easily create with these beautiful paints, but my favorite (no surprise) is making flowers.

The Process:
First clean your dishes with rubbing alcohol.

Then place one drop of ink in the center and watch it bloom.

Place a second drop on top. I used the gold for the second drop but you can experiment with different colors.

Next choose a color for the petals.

Place a drop just outside the center of the flower and use the canned air to shoot the ink up and out making a petal. Continue around with this color creating petals or add another color, in between, over top, the fun never ends.

Note: Don’t like what you see? Use a paper towel and the rubbing alcohol to remove it and start over. 

When you are all done wait a day and give it a couple of coats of varnish to protect your masterpiece. I ended up using a whole can of air to make twelve dishes, including experimenting and starting over a couple of times.

This may be my favorite, but that’s probably because I’m partial to blue. There were so many combinations to create with the kit I purchased but if you have a specific color combo in mind you can easily find it.

For example, this set did not have a red, and maybe you want to make a Christmas themed flower or dish

Source: Alcohol Ink: Stunning Jewelry Dishes to Make and Gift

Simple Yet Stunning: How To Create Artwork with Illustrator’s Blend Tool | Create

If the videos don’t show up and you’d like to see them, click on the link after the article. I’ve placed them in but don’t know if everyone can see them.

With Adobe Illustrator CC’s Blend tool, it’s easy to turn two simple lines into a minimalistic yet intricate vector illustration.I was inspired by Italian artist Andrea Minini, who can make a menagerie with just a few lines. See his work in “Andrea Minini’s Artful Blending.”

Step 1: Begin by drawing a petal that consists of two parts. From Illustrator’s Toolbar, select the Pen tool and draw two base lines. We’ll use these lines to make a blend.


Step 2: Select your lines and go to the Stroke panel, where you’ll change your stroke width and profile. To give your lines a more refined look, select a profile that resembles a calligraphy stroke.


Step 3: To make a blend and to fill the space between your lines with more lines, select the Blend tool and click anywhere on each original line.


Step 4: You can change the number of lines created in the blend by double-clicking the Blend tool, which opens the Blend Options dialog box. Specify the number of steps and check the Preview box to see the changes.


Step 5: To change the shape of the blended object and to close the corners, select your base lines with the Direct selection tool, move the anchor points, and adjust the handles


.Step 6: Repeat the steps above to create the second half of the petal. Continue adding more blends to shape your flower. Once all of the parts are done, bring them together to complete your art.

Source: Simple Yet Stunning: How To Create Artwork with Illustrator’s Blend Tool | Create

From InDesign Basics: Making a Photo Grid

This an amazing tip. I tried it with my own images and it worked perfectly. If you use InDesign give it a try.

Courtesy of Erica Gamet

You can use two of InDesign’s lesser-known tools to create a quick and easy grid of photos or other images. Well, one is a tool and the other isn’t so much a tool, but more of a hidden function. Semantics aside, use these two helpers to create a photo grid either as empty frames on master pages, or create them on-the-fly as you place images in your document.

Setting Frame Fitting Options

First, let’s set a preference or two to make our work easier down the road. Let’s set the image fitting preferences before even creating a frame or placing any images. This way you won’t have to adjust each image’s frame after placing.

  1. With nothing selected—or with no document open to set this behavior for all new docs—choose Object > Fitting > Frame Fitting Options.
  2. Choose Fill Frame Proportionally (or another option that works better for you) from the Fitting drop-down menu.
  3. If you’d like to have the image continually fill the frame as you re-size it, check the Auto-Fit checkbox.
  4. Set any universal crop amount, if desired.

Frame Fitting Options dialog box

Set Grid Spacing

Next, set the amount of spacing you’d like to automatically create between your images in the grid. It’s nearly impossible to do this numerically after the fact, so now is a good time to set the value.

  1. If you already have your document created, choose Layout > Margins and Columns.
  2. Under Columns, set the Gutter amount to the desired amount of spacing.
  3. You can also set this amount in the New Document dialog box when first starting a document.

Place the Images

Now, let’s place some images. Remember, you can create a grid with empty graphics frames, as well. But having some images already populating the frames makes it easier to see the results.

  1. Choose File > Place and navigate to your images. Select as many as you need (we will use 12 in this example). Click Open.
  2. With your loaded cursor, click and drag out your first frame, but don’t release the mouse, yet.
  3. With the mouse button still held down, click the right arrow key twice to add two columns (you should see a grid of rectangles on your page). Click the up arrow key three times to add three rows.
  4. Increase or decrease spacing between the frames by holding down the Command/Ctrl button while clicking the arrow keys (and while still holding down the mouse button…I call this a “bring a friend” shortcut).
  5. Still holding the mouse key, drag the lower right edge to set the overall size of the grid. Finally, release the mouse button (and there was much rejoicing!). Each photo will be placed into a frame in the grid.
Creating the grid

Drag out a shape while using the Up and Right Arrow keys to add rows and columns.

Adjusting the Grid

Lastly, we’ll use the Gap tool to add some variety to our rigid grid.

  1. Choose the Gap tool from the Tools panel (it’s the 4th tool along)
  2. Roll over any gap—between two objects or objects and a page edge—to highlight it.
  3. Click within the gap and drag to re-size objects while maintaining the gap between them.
  4. Shift-click to move and re-size only the objects immediately opposite the gap. By moving individual gaps, you can create variety and break up the monotony of the grid a little bit.

Gap tool
Adjust individual gap

Get the Most Out of the Grid

Note that the frames aren’t linked or connected to each other in any way. Once created, the individual frames in the grid are independent, normal graphic frames. Move, size, split, or combine them manually to add even more variety. Save the layout as a master page by dragging the document page up into the master page section or save the document as a template for re-use.

Easy Ideas for Creating with Clear Glass Ornaments

Today I come to you with gorgeous ideas how to personalize your Christmas tree with DIY ornaments that you can make with your friends or family.

The Christmas ball ornaments are a must have on your Christmas tree. But have you ever thought to improve or to change the design of clear glass ornaments? With these 30 DIY ideas for clear glass ornaments, you can add lots of fun and creative effects to them and make the tree truly shine during the holidays. We’ve selected a few very beautiful DIY projects for you to try this year. Enjoy!

via 30 Creative Ideas for Decorating and Filling Clear Glass Ornaments

Alcohol Ink Ornaments: These Are The Coolest And Prettiest Ever!

These are made with Ranger Alcohol Inks canned air and clear GLASS ornaments. Click the link below for the video that shows you how. This speaks to my love of color. After watching it, it seems pretty easy. I am going to try this, like I need something else to do, right!?


via Alcohol Ink Ornaments | LulaBelle Handicraftsalcohol-ink-ornament-2alcohol-ink-ornament

Santa Card Set

glue-dots-santa-christmas-card-set-merry-wishes-cardWater color and mixed media is all the rage now in the card making world and I included a little bit of it in this Santa card set. With the help of Glue Dots® adhesives, I was able to use different paper mediums to complete the cards.

Made by: Grace Tolman
Time: Approximately 45 minutes
Level: Beginner
Size: 3 cards that is 4 ¼ x 5 ½”

Here’s what you need:

Glue Dots® Premium Permanent GlueTape™
Glue Dots® Pop Up Dots™ (optional)
Cardstock- (white) Neenah 90 lb.; (black) Die Cuts With a View
Pattern papers- Christmas, Recollections
Watercolor paper- Royal Langnickel
Stamp set- Hohoho, Technique Tuesday
Black Ink
Watercolor set
Embossing powder
Circle Cutter
Pearl pen
Glimmer paste
Scissors

Here’s what you do:

Create the card bases using white cardstock.

Stamp the “Santa” image on watercolor paper. Color with watercolor paint and set aside to dry. Cut out the image.

Add some glitter paste onto the Santa images and set aside to dry.

Cut three papers measuring 4 x 5 ¼”. Cut out three 3” circles from paper. Cut 3, 2″ strips of paper.

Stamp the sentiment onto black cardstock using Versamark ink. Heat emboss them using white powder.

Put together the cards. Layer the circles on the right side for two of the cards. Adhere to the pattern paper block using Premium Permanent GlueTape.

Adhere the paper strips onto the left side of the card using Premium Permanent GlueTape. Trim off the excess.

Cut a pennant shape on the bottom of the sentiment black piece and adhere to the top of the paper strip panel. Use Premium Permanent GlueTape adhesive to adhere it in place.

For the third card, place the circle on the center of the big paper block. Place the 2″ paper strip on the bottom of the circle. Layer the sentiment on top of the horizontal paper strip. Adhere everything with Premium Permanent GlueTape.

Adhere all of the layered card panels on the white cards using Premium Permanent GlueTape.

Adhere the Santa images onto the cards using Pop Up Dots for added dimension if desired.

Add some more details to the cards using some pearl pens.

via Santa Card Set

Trade Cards: An Illustrated History – Home

REX056_020

Something I’ve never heard of. Sports trading cards, yes. Advertising? No. These are quite pretty and advertise everything from beer to bread to root beer.

Trade Cards: An Illustrated History features highlights from the Waxman Collection of Food and Culinary Trade Cards–a remarkable assemblage of advertising trade cards about food and related subjects ca. 1870-1900. Trade cards provide a surprisingly revealing look at America during a period of growth and national pride, set against the nineteenth century’s unshakable faith in perpetual civic and individual self-improvement.This online exhibition provides an illustrated overview of the history of trade cards, while exploring the ways in which they illuminate late-nineteenth-century American life, culture, fashion, society, and identity. Written by Nach (1958) and Maron Waxman.

Source: Trade Cards: An Illustrated History – Home